


I purchased my 1987 Turbo R after my previous 1996 Brooklands LPT was rear ended and consequently written off. The Turbo R was undergoing a rebuild and I tool delivery about nine months after the deal was completed. 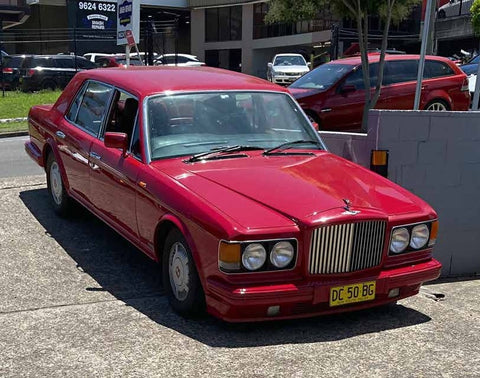
The exterior of the car had new paint work, the woodwork was refurbished and the engine and mechanicals strong. Apart from small issues that you would expect with a 36-year-old car, which I am addressing, the leather work was in need of restoration. I spoke with Garrath Will and he suggested the Leatherique range of products would do the job.
I spent the next couple of weeks looking at YouTube videos on leather restoration until I felt that I could undertake the restoration.
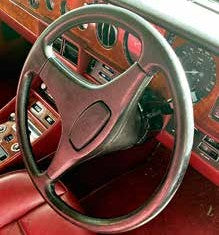
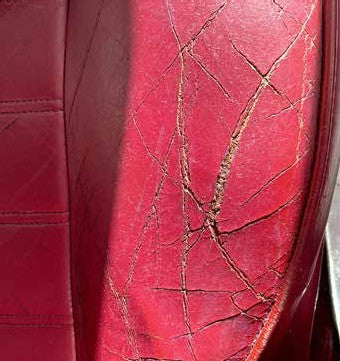
The steering wheel perimeter had dried out making it look pretty second hand with the front seats having cracks in the leather and showing 36 years of wear and tear. I went to Leatherique and started on the journey.
After inspection of the steering wheel and the seats.
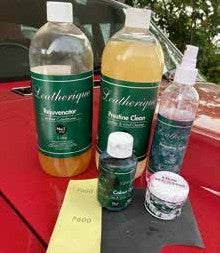
I was instructed to rejuvenate the leather by first using their rejuvenator product and after it has been absorbed use the Prestine Clean product to clean the seats and steering wheel. I was instructed to repeat this practice for at least five times on the seats or until the leather had become soft. After six applications I went back to Leatherique - Australia to replenish my stock of the two products and see the if the leather was ready for the next step. After examination I was told to continue with the rejuvenator and clean process on the seats. The leather on the steering wheel needed no more rejuvenator but needed the Steering Repair Kit and a jar of their acrylic Crack Filler as the steering wheel leather had some splits and the surface had become a suede finish and needed filling before the colour could be applied.
I thought that this would give me some practice before I started on the seats. I left with another bottle of Rejuvenator, Prestine Clean. The steering wheel repair kit and the crack filler.
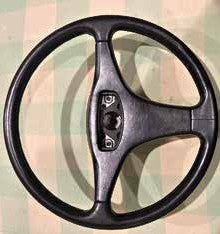
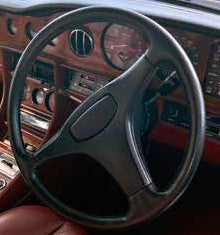
After removing the steering wheel by unclipping the horn button and using a socket to undo the lock nut, I started the preparation on the steering wheel. First, I cleaned the wheel with Prestine Clean and then applied the Prepping Agent. The Crack Filler came next then after it dried sanding with 600 wet and dry sand paper. This was repeated until all the imperfections were filled. I used a flat fridge magnet to apply the drack filler and also later the seats. After the crack filler had dried the colour could be applied. The instructions in the repair kit give adequate directions for the job. I used a small foam rubber pad to apply the colour. This was repeated eight times and before the last two coats were applied, I sanded the wheel so that a smooth finish was achieved.

Two and a half litres of Rejuvenator and two litres of Prestine Clean have been used to bring the seats to a point that I could progress to the next step. I went back to Leatherique Australia to get the dye for the seats confident that the seats were their orginal colour with all the cleaning that had been undertaken and the leather was ready for the finishing process.


The seat colour was matched perfectly and I left with the dye and another bottle of the Rejuvenator and Prestine Clean and a bottle of Prepping Agent.
The front seats were the most damaged and needed the Crack Filler to repair the surface before the dye could be applied. There needed to be a number of applications using the prepping agent and then the crack filler and sanding ready for the next coat. When all the imperfections were removed the dye could be app applied. There were other scratches on the leather work which were attended to with some sanding and a couple of coats of dye. The dye was a perfect match.
The front and back seats were prepped ready for the dye to be applied. I used a fridge magnet to apply the drack filler. I used a fine paint brush to apply the dye after I had cleaned the seats and then used the prepping agent. It took about four coats of dye to cover the drack filler and other marks on the seats. I have put eight coats of dye on the driver's and passenger's seat and four on the rear seats as well as two coats on the door panels. There were adequate dye supplied to do all the leather in the car with some left over.
It has taken four months to complete the restoration. I have found that the products are easy to use and easy to correct any mistakes. Leatherique Australia have been most helpful with advice and direction to complete the rejuvenation of the leather with the end result making it match the rest of the car. It has been a great experience, one that has given me immense satisfaction and one I will enjoy each time I drive the car.

